Accessing Integrated Mapping
In The Canvas we covered how to start a new plan from different plan types, so in this section we will focus on aspects only relevant to integrated mapping.
To access the Integrated Mapping feature
- Select the New Plan Wizard on the Welcome screen.
- In step 1 select a Base Map plan.
- In step 2 you can specify a plan scale or leave it as the default scale.
- Now specify a job location. You can search location by street address or longitudinal and latitudinal coordinates.
- The red cross in the center of the map points to the job location, scroll the map as necessary to the desired location.
- Once the scale and location are set, select Create Plan at the top.
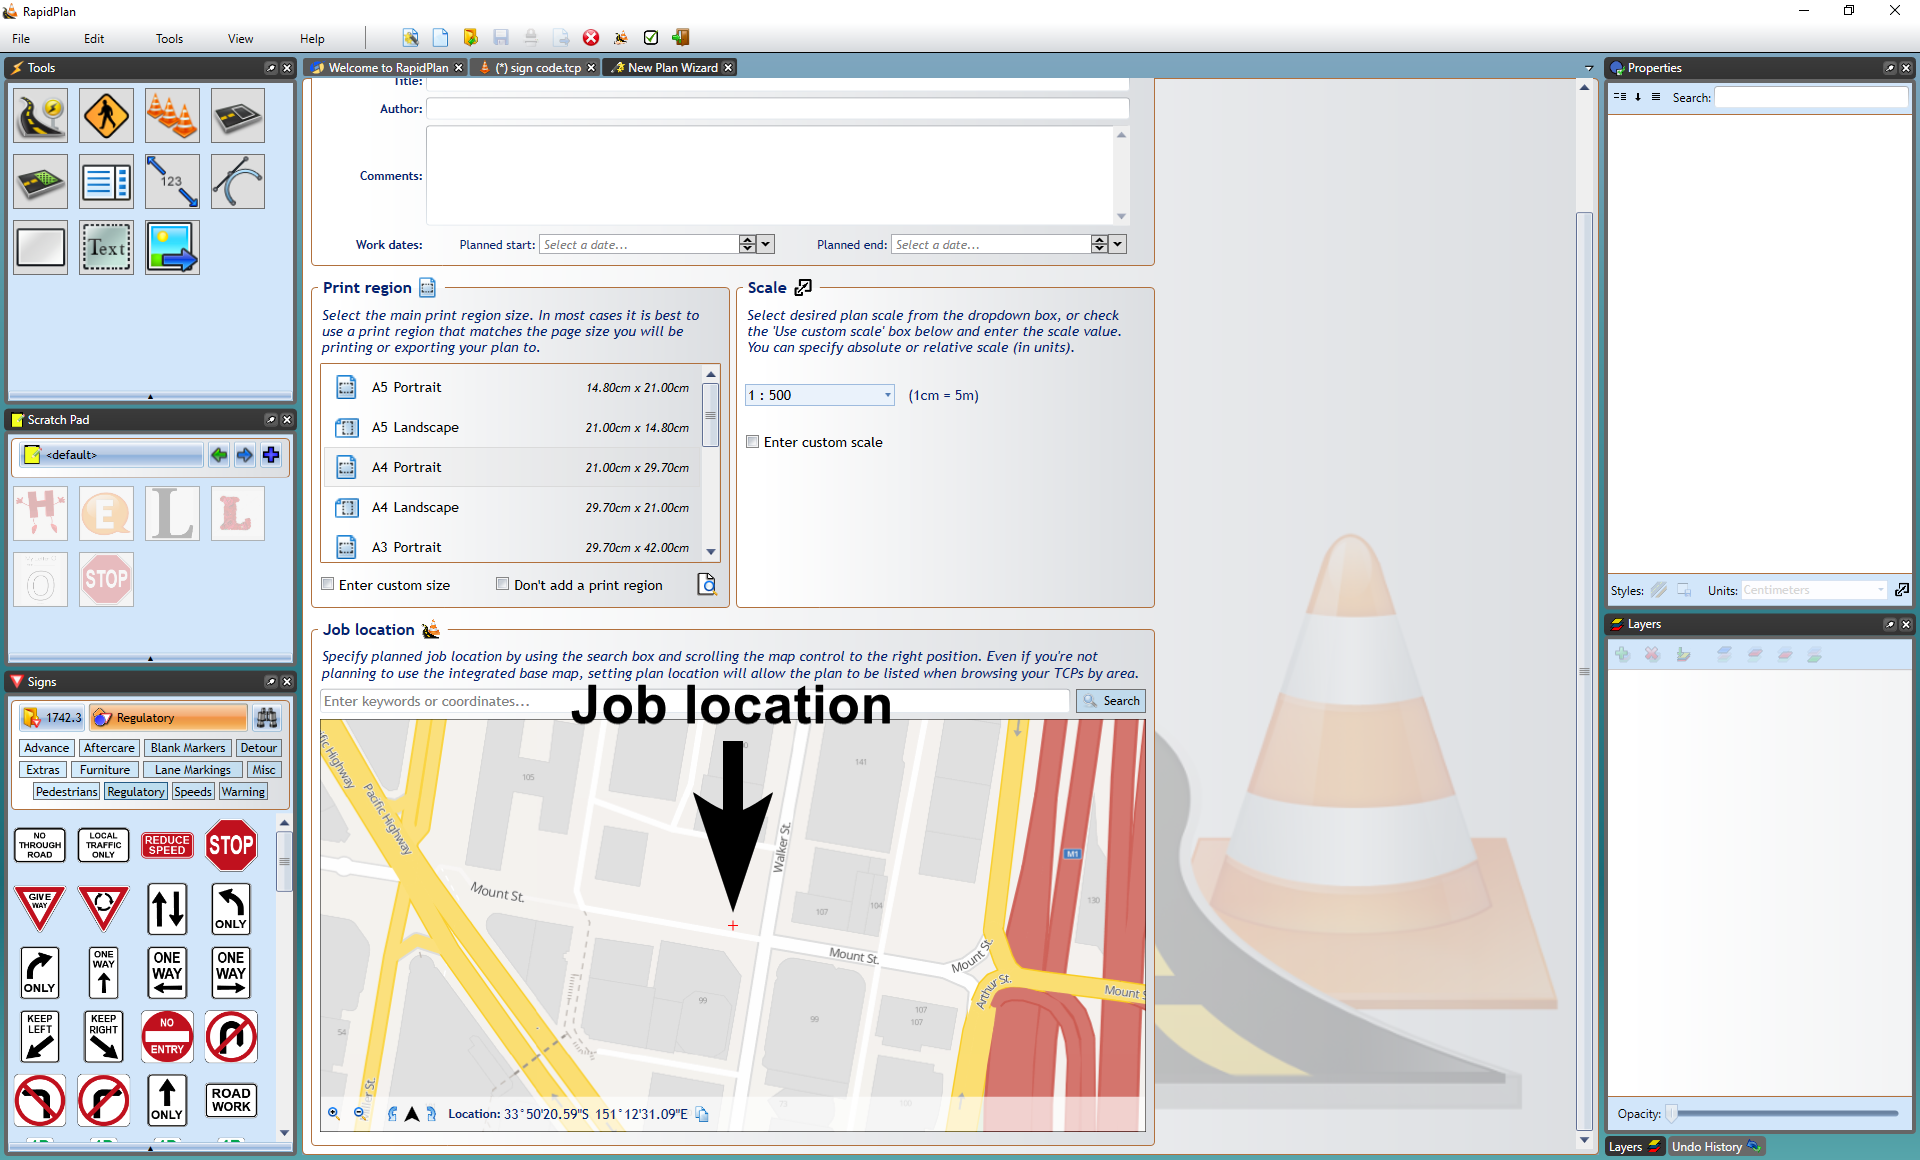
Note: As it is an unrestricted canvas, you can scroll and zoom to anywhere on the map you like. This means it can be important to be fairly precise when setting your job location in step 2 so that you can find the exact spot when searching plans by location in the future.

Map Properties
The Base Maps tab in the plan's Properties Palette allows you to control whether to show the map on the plan, choosing a Provider for the map and the opacity of the map.
Base Map Provider
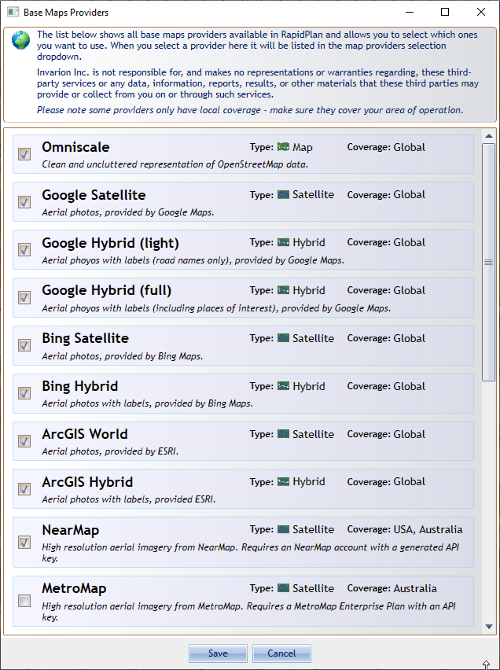
Eight base map providers are available to all RapidPlan users. These are:
- Omniscale - Street view, provided by Omniscale
- Google Satellite - Satellite imagery, provided by Google
- Google Hybrid (light)- Satellite imagery with street names and annotations, provided by Google
- Google Hybrid (full) - Satellite imagery with street names, annotations and road outlines, provided by Google
- Bing Satellite - Satellite imagery, provided by Bing
- Bing Hybrid - Satellite imagery with street names and annotations, provided by Bing
- ArcGIS World - Satellite imagery, provided by Esri
- ArcGIS Hybrid - Satellite imagery with street names and annotations, provided by Esri
There's also a number of region-specific mapping providers available in the software, depending on which country version you have access to.
To view these additional mapping providers, go to the Base map section of the Properties palette. Select the Provider dropdown menu. Click More providers.... In the dialogue box (displayed in Figure 14.3), check the providers you want to use. These will then become visible in the dropdown menu.
Please note: Access to content from NearMap and Metromap (both available to users in USA, Australia and New Zealand) requires a paid subscription to those services.
Custom Base Map Provider
You can also add your own custom map provider. It is disabled by default and to change it go on Properties palette in the Base map section open Provider selection dropdown, click More providers.... On bottom of the list check Custom ArcGIS Service and press Save button. Now on Provider selection dropdown click on Custom ArcGIS Service which will open a new window where you can enter your custom map provider Service address. Press Get Details button and if your service address is valid, you can save it and/or add it to bookmarks.
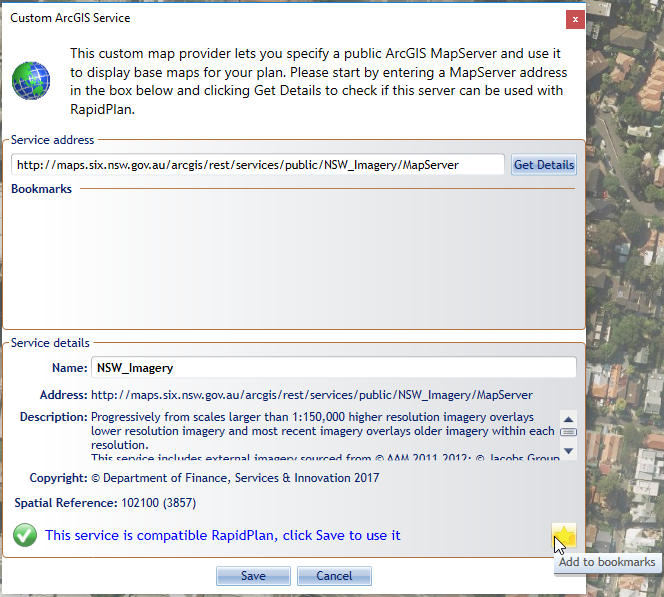
Custom Base Map Provider requirements
- RapidPlan version >= 3.2
- Supported data formats: standard World File, MapInfo raster .TAB file
- Spatial reference: ESRI 102100/3857 (Web Mercator)