Contributing to the project
Contribution to this project may come in different forms: writing a new article, refining an existing article, fixing a typo.
Pre-requisites
- To make changes to the repository you need to have a github account that is linked to the Invarion organization.
- Clone the repository to your local machine.
- Make sure that you can run the project locally following the instructions in the README.md file.
Before you begin
Define the goal of your task. It should be clear what you want to achieve. The rule of thumb that the task should be small enough to be completed in between half a day and two days but big enough to be meaningful and provide value for the readers of the Help Centre. E.g. "write an article about new feature in RapidPlan", "split one large article into smaller ones", "fix typos", "update obsolete screenshots in one article".
Having reasonably small goals would help to avoid merge conflicts, prevent the writer from slipping into wrong direction, fail fast and what's the most important - making review process possible because the reviewer can only work with the changes that are small enough to be reviewed in a reasonable time.
Workflow
- Switch to the
masterbranch by runninggit checkout masteror via IDE .
. - Don't forget to pull latest changes from the remote repository by running
git pull masteror via IDE .
. - Create a new branch by running
git checkout <branch-name>or via IDE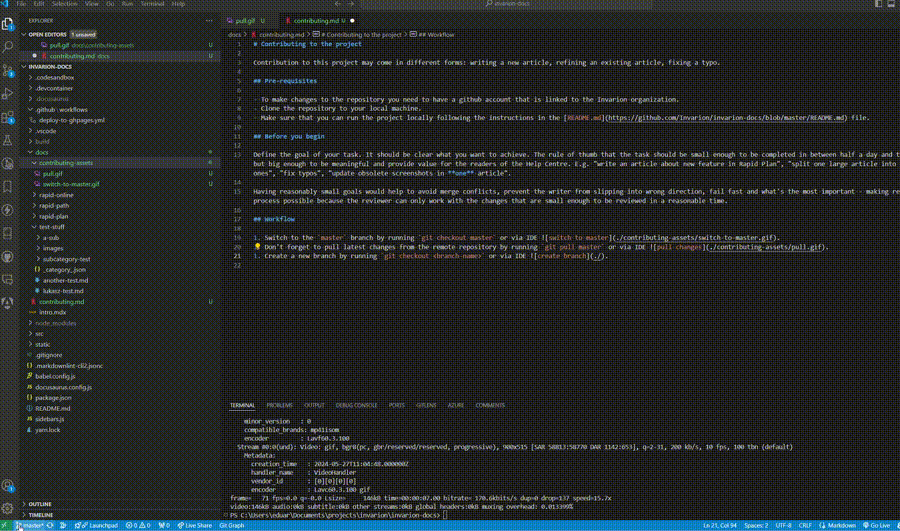
- branch name should be descriptive and reflect the goal of the task, written in kebab-case, e.g.
update-obsolete-screenshots-in-rapidplan-article,explore-vehicle-library.
- branch name should be descriptive and reflect the goal of the task, written in kebab-case, e.g.
- Start adjusting the content
- Once some progress is done that is worth fixation, commit the changes using commit button in the Source Control tab with message describing what was done. Remember that the task may (and often should) consist of multiple commits.
- Once the task is completed, push the changes to the remote repository by pressing on Push button.
- Go to the github repository page and create a new pull request by pressing on the New pull request button and selecting your branch in the compare list.
Example video of the workflow.
Project structure
- Follow standard recommendations from docusaurus documentation.
- Name files and folders in kebab-case, e.g.
new-feature-in-rapidplan.md,vehicle-library. No numbering is needed.- File names are usually in lowercase.
- Words are separated by hyphens (-).
- The file extension should be .md for Markdown files.
- The document's id is determined by the file name. For example, if your file is named my-doc.md, the id of the document will be my-doc.
Metadata and sidebar configuration
Each article and section may have metadata. Metadata is configured differently for articles and sections.
Metadata for articles
Metadata for articles is defined at the beginning of the file in the following format:
---
sidebar_position: 2
title: My Custom Title
tags: ['tag1', 'tag2', 'tag3']
---
Tags are used for SEO purposes, sidebar_position is used to define the order of the article in the sidebar.
Metadata for sections
Each folder in the docs directory represents a section in the sidebar. The section metadata is defined in the _category_.json file in the following format:
{
  "label": "RapidPlan Online",
  "position": 1
}
Name of folder is used as a label, however, it can be overridden by the label property. Position is used to define the order of the section in the sidebar.
Style guide
The project uses Markdown lint to enforce a consistent style across the documentation. The rules are defined in the .markdownlint-cli2.jsonc file.
Use markdown lint plugin that is available in your IDE to check the style of the document. Fix all yellow and red warnings before creating a pull request.
Images
Image Size
Image size is to be altered in order to keep its proportions in comparison to text readable.
Image size is easily altered using Windows' native Photos program:
- [If the image is already in VS Code] find it in VS Code's file tree > right-click > Reveal in File Explorer.
- Copy the path of the folder that opens as you'll need it in a moment. Then double-click the image, which should by default open the image in Photos.
- At the top of the screen click the 3 dots > Resize Image > set the image's width in terms of pixels > click OK.
- It will ask for a save location & name -- Paste the file address you copied earlier in the Address Bar > save the file with the same name as it had before, replacing the original.
| Image type | Preferred image size |
|---|---|
| Larger, full screenshot image | Horizontal: 930 pixels |
| View of a single palette in default narrow layout | Horizontal: 330 pixels |
| Full screen shot minus one of one side's palettes (typically cutting off some height) | Horizontal: 700 pixels |
Image markup is to be done in the program Share X. Once you have Share X, screen shots/captures will automatically appear in its library, markup (text, selection boxes and arrows) can be applied by going into Edit mode (Ctrl + E or right-click + Edit).
Selection Box style:
Used to bring attention to a particular area/s of an image.
- Default Rectangle tool in Share X.
- Transparent fill.
- Red outline, hex colour code FF0000.
Arrows:
Used to draw attention to a particular point in an object, or perhaps something smaller in an image.
Use default Arrow tool, with hex colour code FF0000 (red).
Text: Use the "Text (Outline)" tool.
- Black fill and no outline wherever possible (set outline to transparent)
- In exceptional cases where text can't be read, use red font.
- No text boxes/background.
- Arial font, size 25.
- Keep text size very readable, but on the smaller side. Only increasing its size if required for the text to be noticeable in the scene.
Headings
Try to keep headings succinct and in simple language. Often it is best for the heading to simply be the thing the section will be explaining.
There are three main tiers of heading:
'#' is the largest, only used at the start of a file. '##' are mid and related to the primary topics of the file, falling within the purview of the file's primary heading/title. '###' for headings subordinate to '##' headings.
Generally this shouldn't happen and ought to be avoided, but if there is a case for a fourth tier of heading, these can be represented using bold lettering.
Capitalisation in headings
'#' and '##' tier headings have all words capitalised that aren't little conjunction/definite article words (like 'as', 'and, 'in', 'a', 'the' etc.), unless the little word is at the start of the sentence.
'###' and (if necessary) 'four tier bold' headings are made up of words in lower case, unless they start the sentence or are the name of a product/feature ('Scratchpad' etc.).
Referring to buttons
| The button | How to refer to it (including the use of bold) |
|---|---|
| Control | Ctrl |
| Escape | Esc |
| Spacebar | Spacebar |
| **Left, Double and Right click | Left click, Double click & Right click |
| Any other key | Predictably: [that key] (eg. 'Alt', 'X', 'Shift', '2', 'Enter', etc.) |
| Click paths | Bold, 'more than' symbols ('>') between each step, a space between words and the '>'. Capitalise as if a top tier heading (see above). Single quotation marks used if something needs to be clicked that isn't a standard sounding button/step in the path: Eg: 'Tools > Preferences > go to 'Export/Import Settings' > Export'. |
| Key combinations | When keys are pressed at the same time. In bold, plus (+) symbol between each button, spaces around the plus symbol. Eg. 'Ctrl + Z'. |
Other uses of Bold
Drawing attention to a topic/feature that is key to that or a coming section.
Italics
Used sparingly, as you would normally use italics:
- Drawing attention to something that doesn't fit the description of Bold use cases.
- To add emphasis.
Capitalisation in body
Markdown Lint rules not currently observed/obeyed
(As seen when VS Code add-on 'markdownlint' is enabled)
- MD036/'no emphasis as heading': Not observed currently as a fourth tier of heading proves useful and it hasn't broken anything.
- MD024/'no duplicate headings': I believe this rule is only broken in the Release Notes sections, as headings like 'More changes' connotate the beginning of more minor changes for that release period.